Virtual Machine Queue (VMQ) Mode in Network Adapter Driver
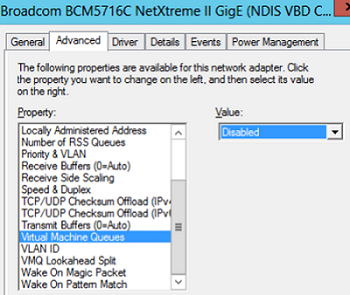
In some cases, if VMQ (Virtual Machine Queue) is enabled in a network adapter driver of a physical Hyper-V host, it may result in poor network performance in Hyper-V virtual machines. VMQ is a hardware feature and if it is not supported by your hardware but enabled in the driver, it can result in packet loss and increased network latency. The problem is typical to Broadcom Gigabit network adapters and occurs in all Hyper-V versions (Windows Server 2012 R2/2016/2019).
You can disable VMQ in the properties of your network adapter driver.
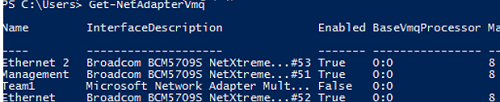
Or you can display a list of network adapters with VMQ support and their status using PowerShell:
Get-NetAdapterVmq
To disable VMQ for a specific NIC, run the command below (the network adapter will be unavailable for a couple of seconds):
Set-NetAdapterVmq -Name “NICName” -Enabled $False
After disabling VMQ, it is better to restart the host and check the network performance.
Optimize TCP Settings for Hyper-V on Windows Server 2019
Save the current TCP settings on your Hyper-V host and apply new settings that will make TCP settings in Windows Server 2019 almost similar to those of Windows Server 2016.
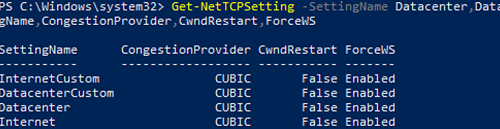
Save the current settings:
Get-NetTCPSetting -SettingName Datacenter,DatacenterCustom,InternetCustom,Internet|select SettingName,CongestionProvider,CwndRestart,ForceWS|Export-csv c:\backup\ws2019_network_stack_settings_nettcp_backup.csv
Apply new NetTCP settings for LAN:
Set-NetTCPSetting -SettingName DatacenterCustom,Datacenter -CongestionProvider DCTCP
Set-NetTCPSetting -SettingName DatacenterCustom,Datacenter -CwndRestart True
Set-NetTCPSetting -SettingName DatacenterCustom,Datacenter -ForceWS Disabled
For WAN:
Set-NetTCPSetting -SettingName InternetCustom,Internet -CongestionProvider CTCP
Set-NetTCPSetting -SettingName InternetCustom,Internet -DelayedAckTimeoutMs 50
Set-NetTCPSetting -SettingName InternetCustom,Internet -ForceWS Disabled
Disable network RSS and RSC network optimization methods at the TCP stack level:
netsh int tcp show global
netsh int tcp set global RSS=Disabled
netsh int tcp set global RSC=Disabled
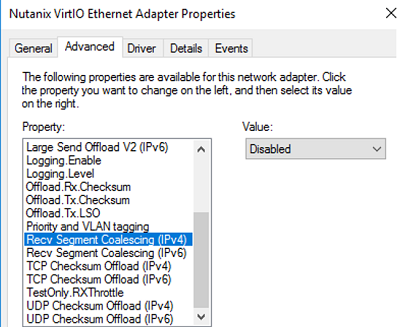
or on the NIC level:
Get-NetAdapter | Set-NetAdapterAdvancedProperty -DisplayName "Recv Segment Coalescing (IPv4)" -DisplayValue "Disabled" -NoRestart
Get-NetAdapter | Set-NetAdapterAdvancedProperty -DisplayName "Recv Segment Coalescing (IPv6)" -DisplayValue "Disabled" -NoRestart
Get-NetAdapter | Set-NetAdapterAdvancedProperty -DisplayName "Receive Side Scaling" -DisplayValue "Disabled" –NoRestart
Disable vRSS for all VMs:
Get-VM | Set-VMNetworkAdapter -VrssEnabled $FALSE
Disable Large Send Offload (LSO) on NICs:Get-NetAdapter | Set-NetAdapterAdvancedProperty -DisplayName "Large Send Offload Version 2 (IPv4)" -DisplayValue "Disabled" -NoRestart
Get-NetAdapter | Set-NetAdapterAdvancedProperty -DisplayName "Large Send Offload Version 2 (IPv6)" -DisplayValue "Disabled" -NoRestart
Get-NetAdapter | Restart-NetAdapter
- Recv Segment Coalescing (IPv4/IPv6) = Disabled
- Large Send Offload V2 (IPv4/IPv6) = Disabled
These TCP stack settings will make Windows Server 2019 network protocol settings similar to those of previous Windows Server versions.